Activity
2 - Student Procedure:
IDENTIFICATION OF PHI X 174 RF DNA BY RESTRICTION MAPPING
Wet
Lab (Hands-On):
RESTRICTION DIGEST AND GEL ELECTROPHORESIS (2):
Be sure to use a fresh micropipet tip each time to prevent cross-contamination.
1. With a sharpie pen, label three microcentrifuge tubes 1, 2 and 3.
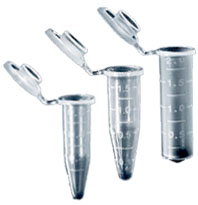
(Image from
www.marshbio.com/dept.sp?dept_id=3014
- Marsh Bio Products, 2003)
2.
Place the microcentrifuge tubes on shaved ice, or in a cold block.
3. Add sterile, distilled water to all tubes in the following amounts: 7.5
ml to tube 1, 7 ml
to tube 2, and 6.5 ml to tube 3.
4. Add 1 ml of PhiX174 DNA to each tube.
5. Add 1 ml of NEB 4 buffer to each tube.
6. Take the restriction enzymes out of the freezer, and place them on ice
or in the cold block.
7. Add 0.5 ml of DraI restriction enzyme to tubes
1 and 3.
8. Add 1 ml of MfeI restriction enzyme to tubes
2 and 3. Note that you have now set up the following PhiX174 DNA digests:
tube 1: DraI only
tube 2: MfeI only
tube 3: DraI and MfeI together
9. Return the restriction enzymes to the freezer.
10. Close the tubes and mix the contents gently by tapping the bottom of
the tubes with your finger.
11. Spin the tubes for about 1 second in a microcentrifuge; make sure the
microcentrifuge is balanced by giving each tube a “partner”
directly across. In case of an odd number of tubes, use a “dummy”
tube with 10 ml water in it.
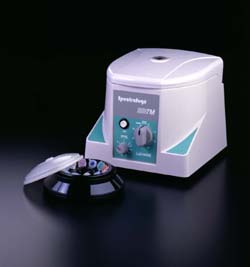
(Image from
www.labnetlink.com/inter/spectra7.htm
- Spectrafuge 7M Microcentrifuge, 2003)
12.
Incubate the tubes for 1 hour at 37’C. Make sure you can tell your tubes
apart from those of other groups.
13. While the restriction digests are incubating, add 0.35 grams of agarose
powder to 50 ml 1x TBE buffer in an ehrlenmeyer flask. Swirl to mix. Let sit
at least 1 minute to hydrate the powder.
14. Heat the agarose solution to boiling on a hot plate or in a microwave oven.
The solution should be clear. Use hot pads to set the flask aside to cool.
15. Tape up the ends of the gel tray and insert the comb.
16. As soon as the agarose is cool enough to touch comfortably (but before it
solidifies), pour the agarose solution into the gel tray to a thickness of about
3 mm.
17. Allow the gel to solidify in the refrigerator for about 15 minutes.
18. Remove the tape and place the gel tray in the gel box.
19. Add enough 1x TBE buffer to just cover the gel.
20. Gently wiggle the comb sideways before slowly pulling it out of the gel.
21. If the incubation is complete, take the tubes out of the water bath and
add 2 ml 6x gel loading dye to each. Mix and spin
as before.
22. Load 10 ml from each tube into a well. Your instructor
will tell you if you should load DNA size markers into a fourth well.
23. Close the gel box and hook up its leads to the power supply (black to black,
and red to red). DO NOT TOUCH the gel while it is running!
24. Run the gel at 100 Volts until the blue dye is two thirds of the way down
the gel (about 45 minutes).
25. Turn off the power supply, unhook the electrical leads, and open the gel
box.
26. Put on latex gloves. Remove the gel and transfer it to a plastic tray containing
dilute (toxic!) Ethidium Bromide solution. Stain for approximately 20 minutes,
tilting the tray occasionally to mix.
27. Destain the gel for about 5 minutes in distilled water (use a large spatula
to move the gel from tray to tray).
28. Put on a UV face shield and dim the room lights. Place the gel on a UV transilluminator
and take a Polaroid picture.
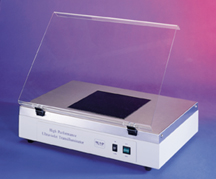
(Image from www.kodak.com/.../scientific/products/uvBox/index.shtml
-
UVP Model TFM-30 and TFM-20 Transilluminator, 2003)
Online
portion: NEBCUTTER:
1. Go to http://tools.neb.com/NEBcutter/index.php3.
2. Click on the PhiX174 link listed under “test sequences”.
3. A map of the circular PhiX174 DNA will appear. Several restriction sites
are shown; enzyme names are abbreviated in red. The grey arrows show the location
of genes, or Open Reading Frames (ORFs). The abbreviation “aa” stands
for amino acids.
4. Click on “Custom Digest”. A complete list of restriction enzymes
that can cut PhiX174 DNA at least once appears. For each enzyme, its specificity,
or DNA recognition sequence is shown:
(a) Note that the sequence of only one DNA strand is given. That is because
we can use base-pairing rules and this sequence to figure out the sequence of
the opposite, complementary strand. According to the base-pairing rules, A always
base pairs with T, and G always base pairs with C. Note that the two strands
are identical when read in opposite directions.
(b) Also note that some enzymes are pickier than others. G, A, T, and C refer
to the nucleotide letters in the DNA alphabet. Y stands for pyrimidine (either
T or C will do), M stands for A or C, K stands for T or G, R stands for purine
(G or A), and N stands for any base.
The list also shows the number of times each enzyme will cut PhiX174 DNA, and
the % activity in each NEB buffer.
5. Since we will include a double digest (cutting with two different enzymes
in the same tube), we will want to use enzymes that will perform well together
in the same buffer. Click on “Enzymes with compatible buffers” and
scroll down to NEB 4 (green) for enzymes that cut optimally in NEB buffer #4.
6. Select DraI. Click on the digest button at the bottom. The computer will
now generate a circular map showing DraI cutting sites.
7. Click on “View gel” to predict what the gel will look like. Note
the fragment coordinates (each PhiX174 base is numbered) and predicted fragment
lengths on the top right. Print out this page.
8. Go back to the NEB 4 (green) list, and repeat the process for MfeI, then
for DraI and MfeI together.
9. Compare the printed lanes to your experimental results.